Theme
If you are a Kuzhi VIP member, you can directly download and import the workflow
https://wwaod.lanzn.com/b011lwl8ij
Password: 3qnp
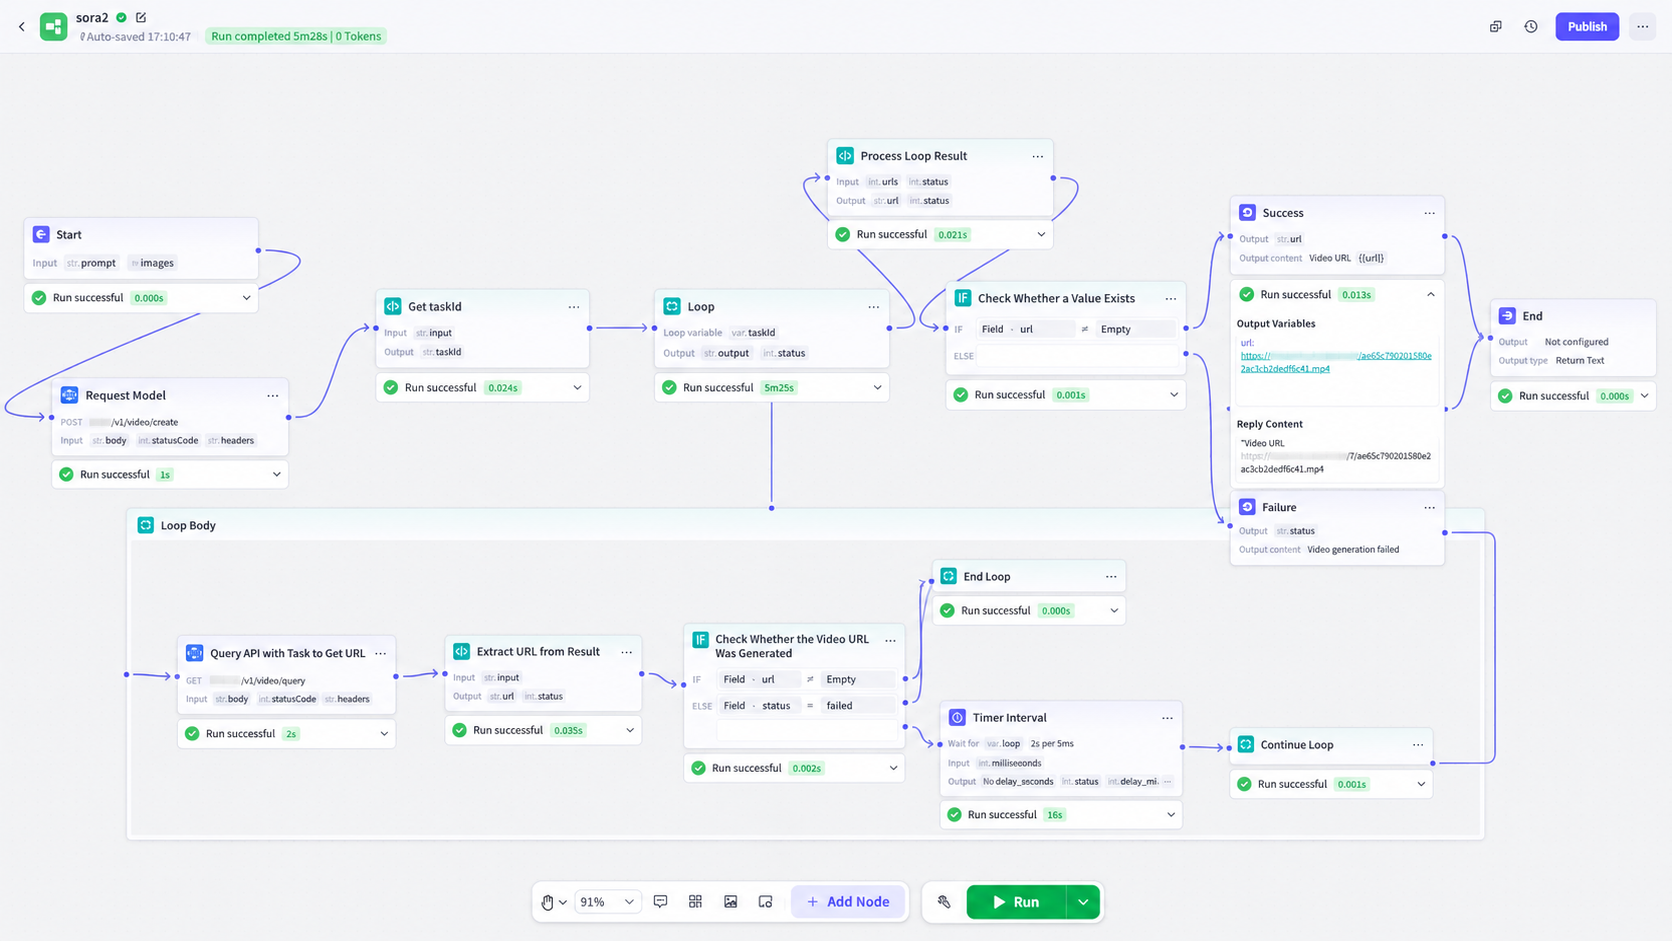
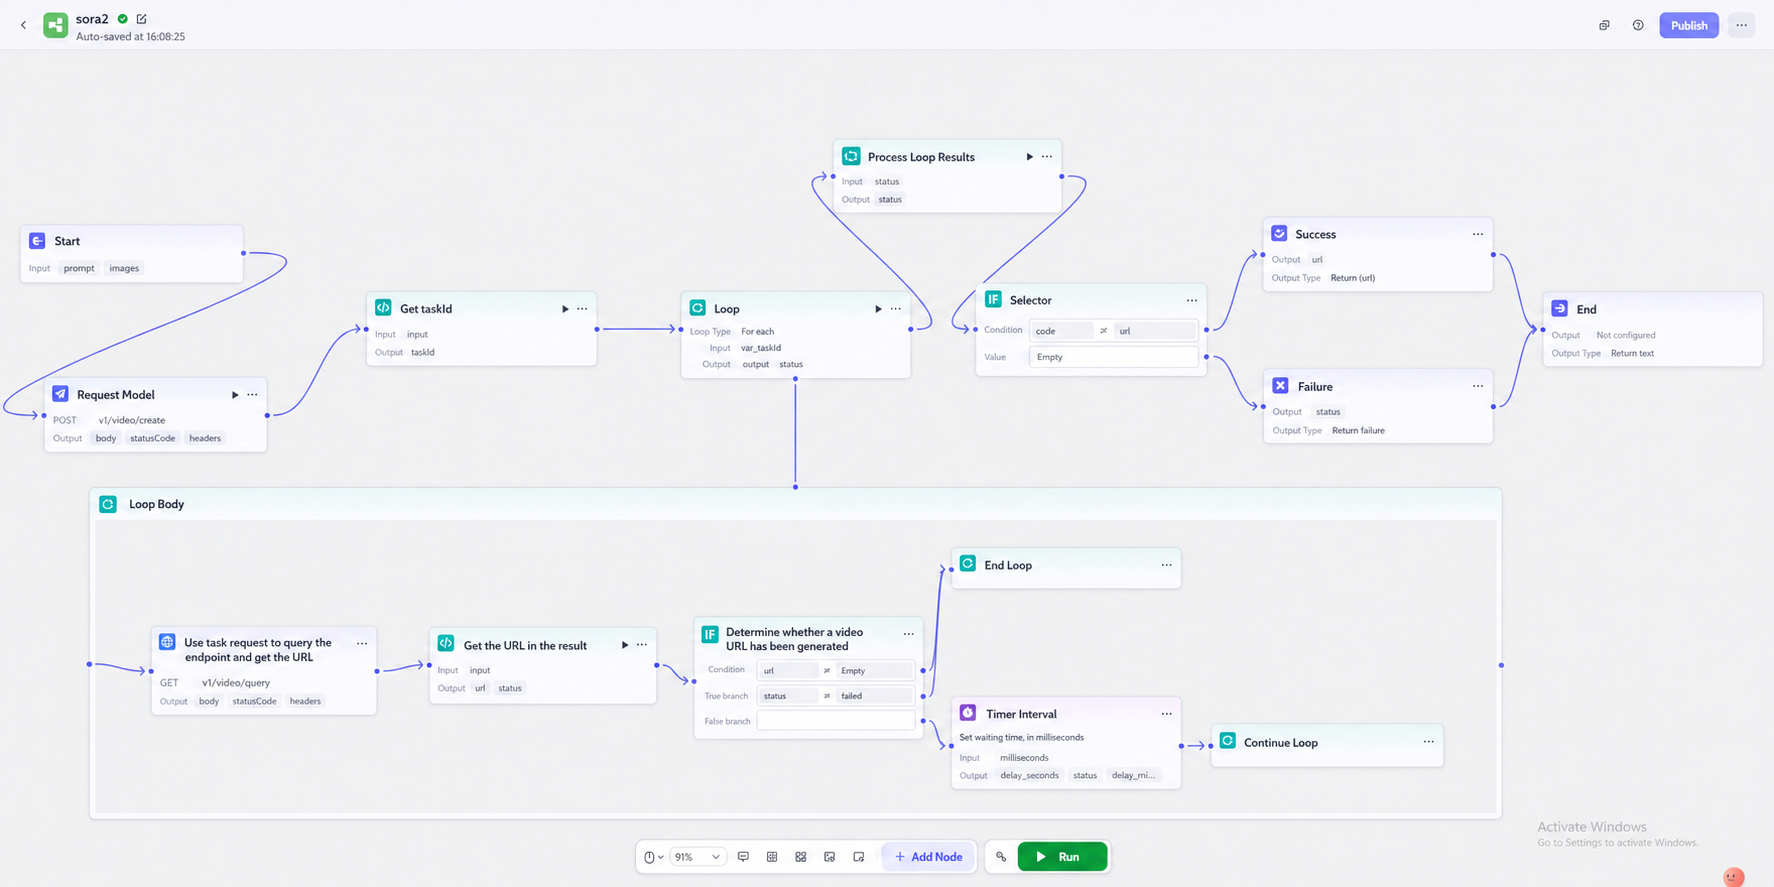
Simple loop workflow example using sora2: from text input and image upload to final URL retrieval (overall diagram below)
I. Getting Started
Add input variables based on the prompt and image. Add parameters according to what the API requires. You can add more parameters if needed.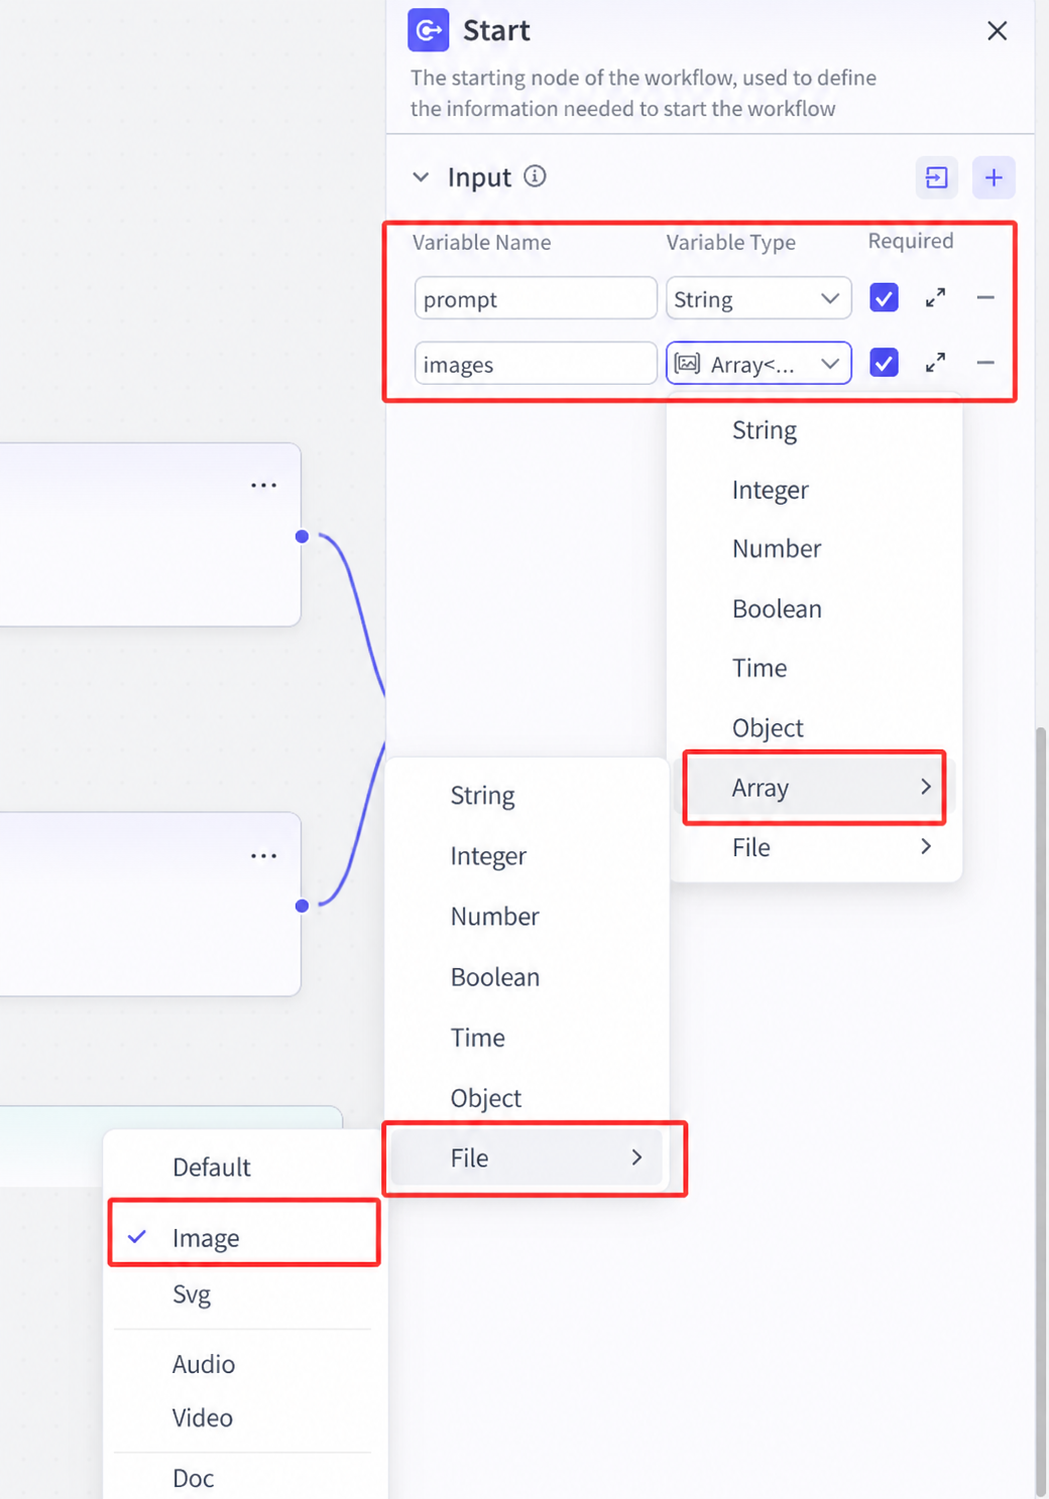
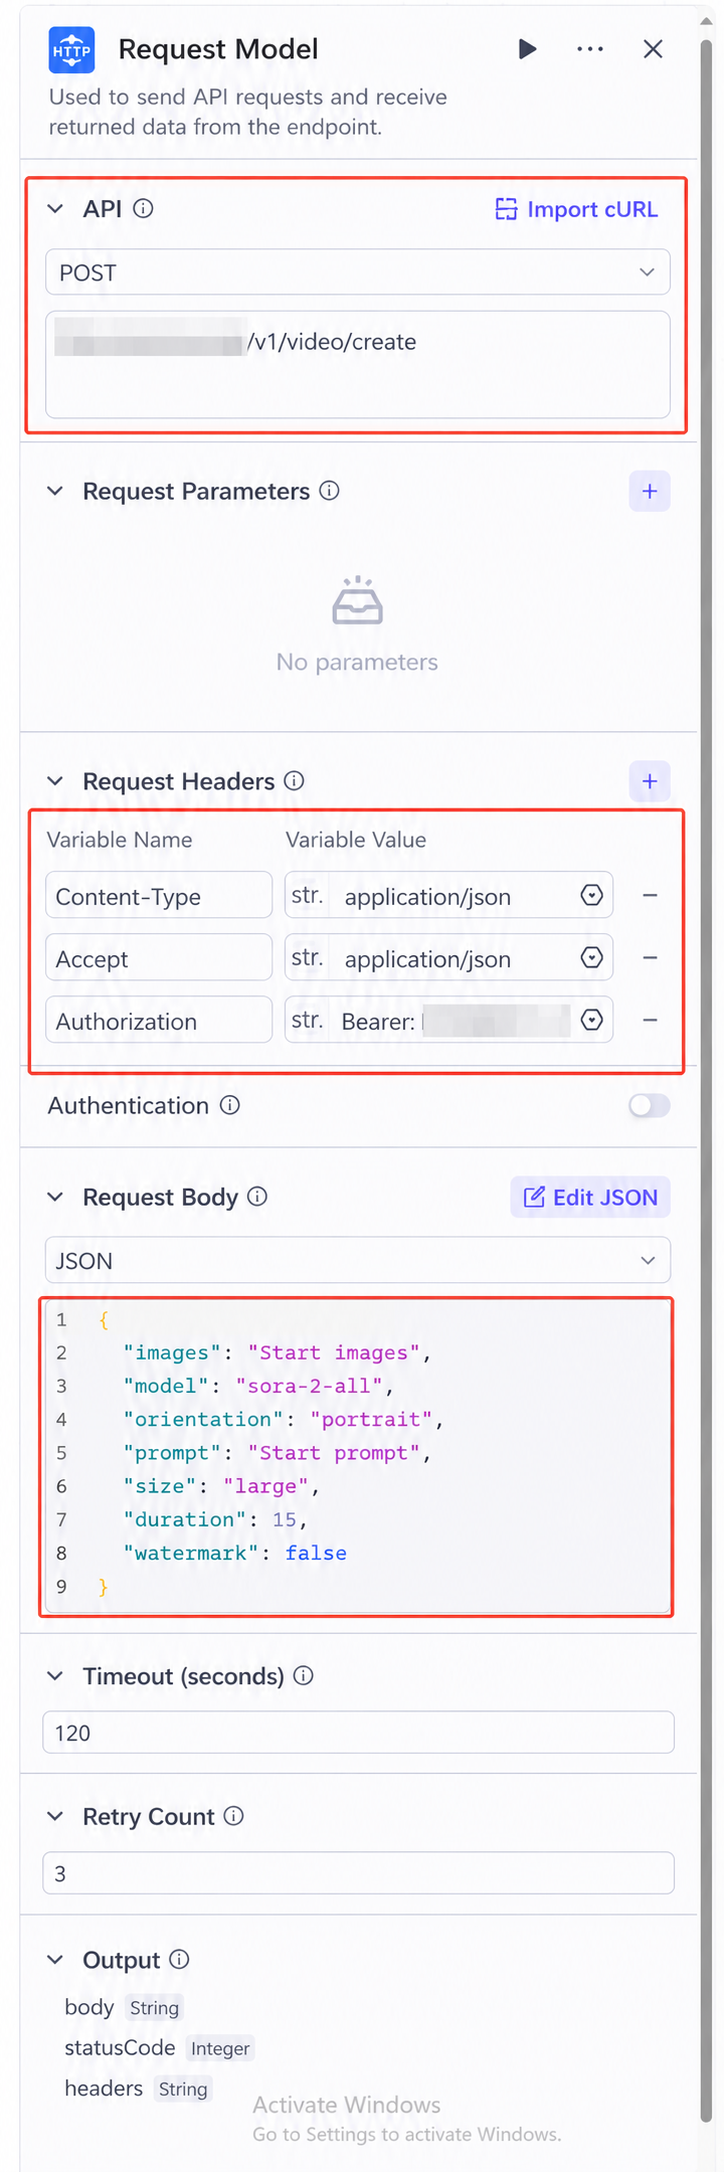
II. Request Model (Add HTTP Node)
Configure the HTTP request according to the documentation
- Configure the request method and URL in the first red box
- Configure the request headers in the second red box
- Configure the request body in the third area. Select the format according to the request body in the documentation. In this example, JSON is used. Parameters marked as "start" are obtained from the previous input. You can directly input {} in the editor to select them.
III. Process Request Result to Get taskId (Add Code Node)
As shown in the figure, when inputting, the variable value directly retrieves the output body from the previous step.
Use code to parse the body and extract the id from it (in this example, JavaScript is used. The code is as follows)
async function main({ params }: Args): Promise<Output> {
    // 1. Get the body string from params.input
    // Note: This assumes that params.input is the entire HTTP response body
    const bodyStr = params.input;

    // 2. Parse the body string into a JSON object
    // Since the body value is a string like "{\"id\":...}", JSON.parse is required
    let taskId = "";
    try {
        const bodyObj = JSON.parse(bodyStr);
        taskId = bodyObj.id;
    } catch (e) {
        // Prevent runtime errors if JSON parsing fails
        console.log("Failed to parse JSON:", e);
    }

    // 3. Build the output object and return taskId
    const ret = {
        taskId: taskId
    };

    return ret;
}
The variable name at the output location should match the parameter name in ret in the code.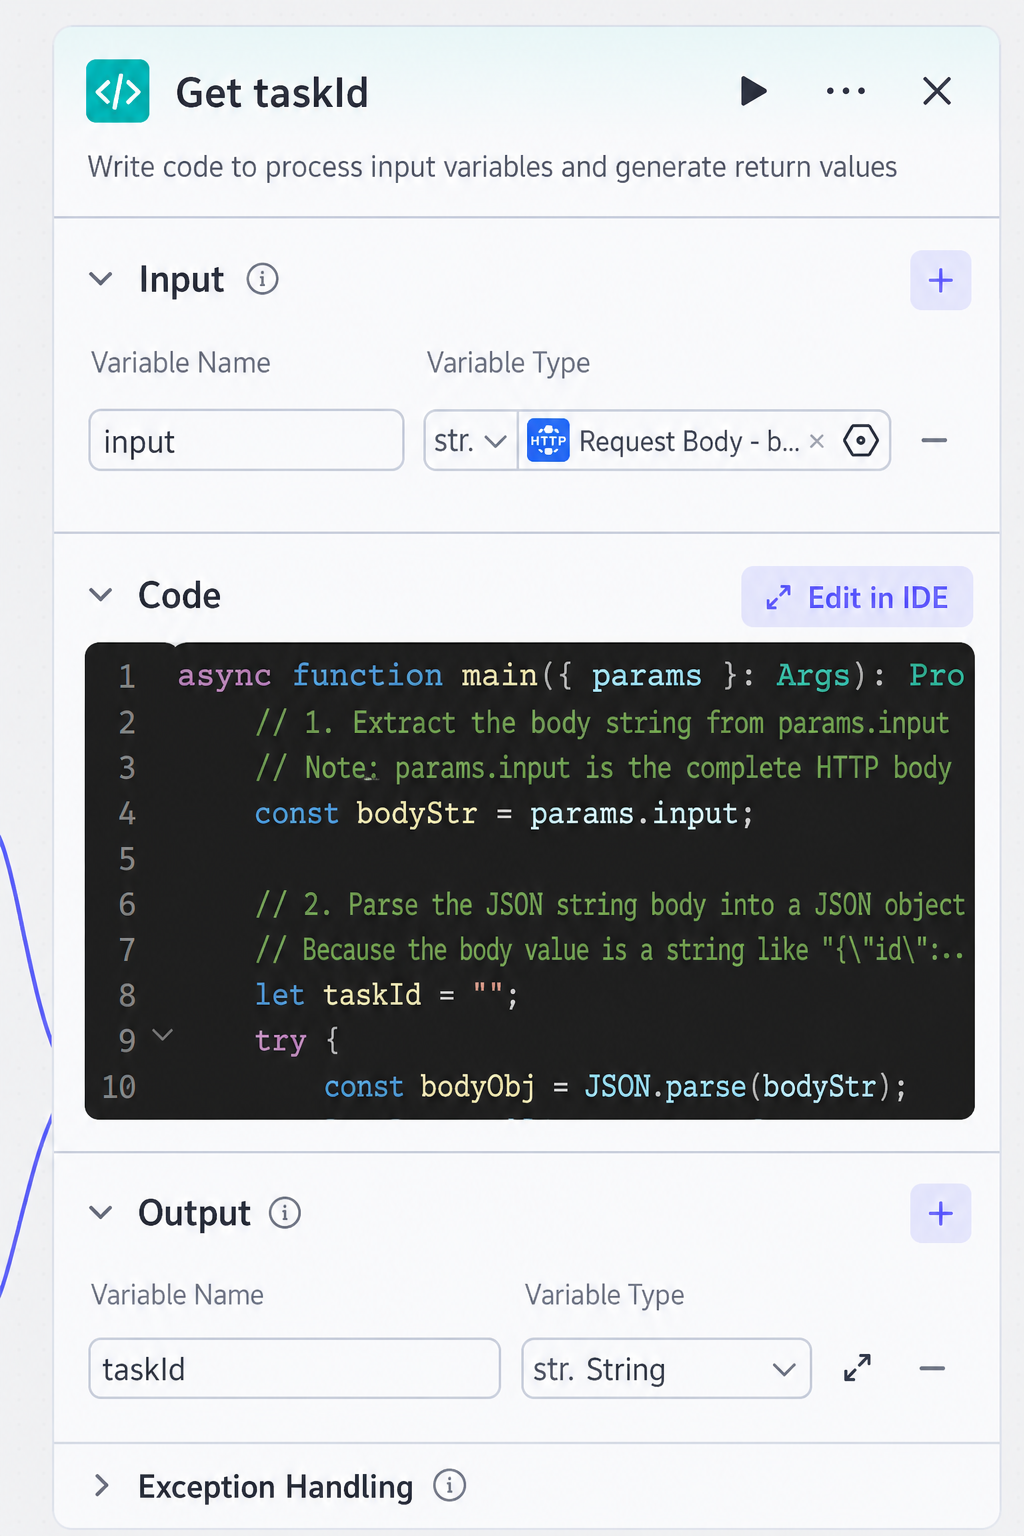
IV. Loop Request Query Interface to Get URL (Add Loop Node)
1. Set up the loop (in this example, an infinite loop is used and exits based on judgment conditions). Set as needed.
The intermediate variable obtains the taskId output from the previous code node.
Outputs the URL and status.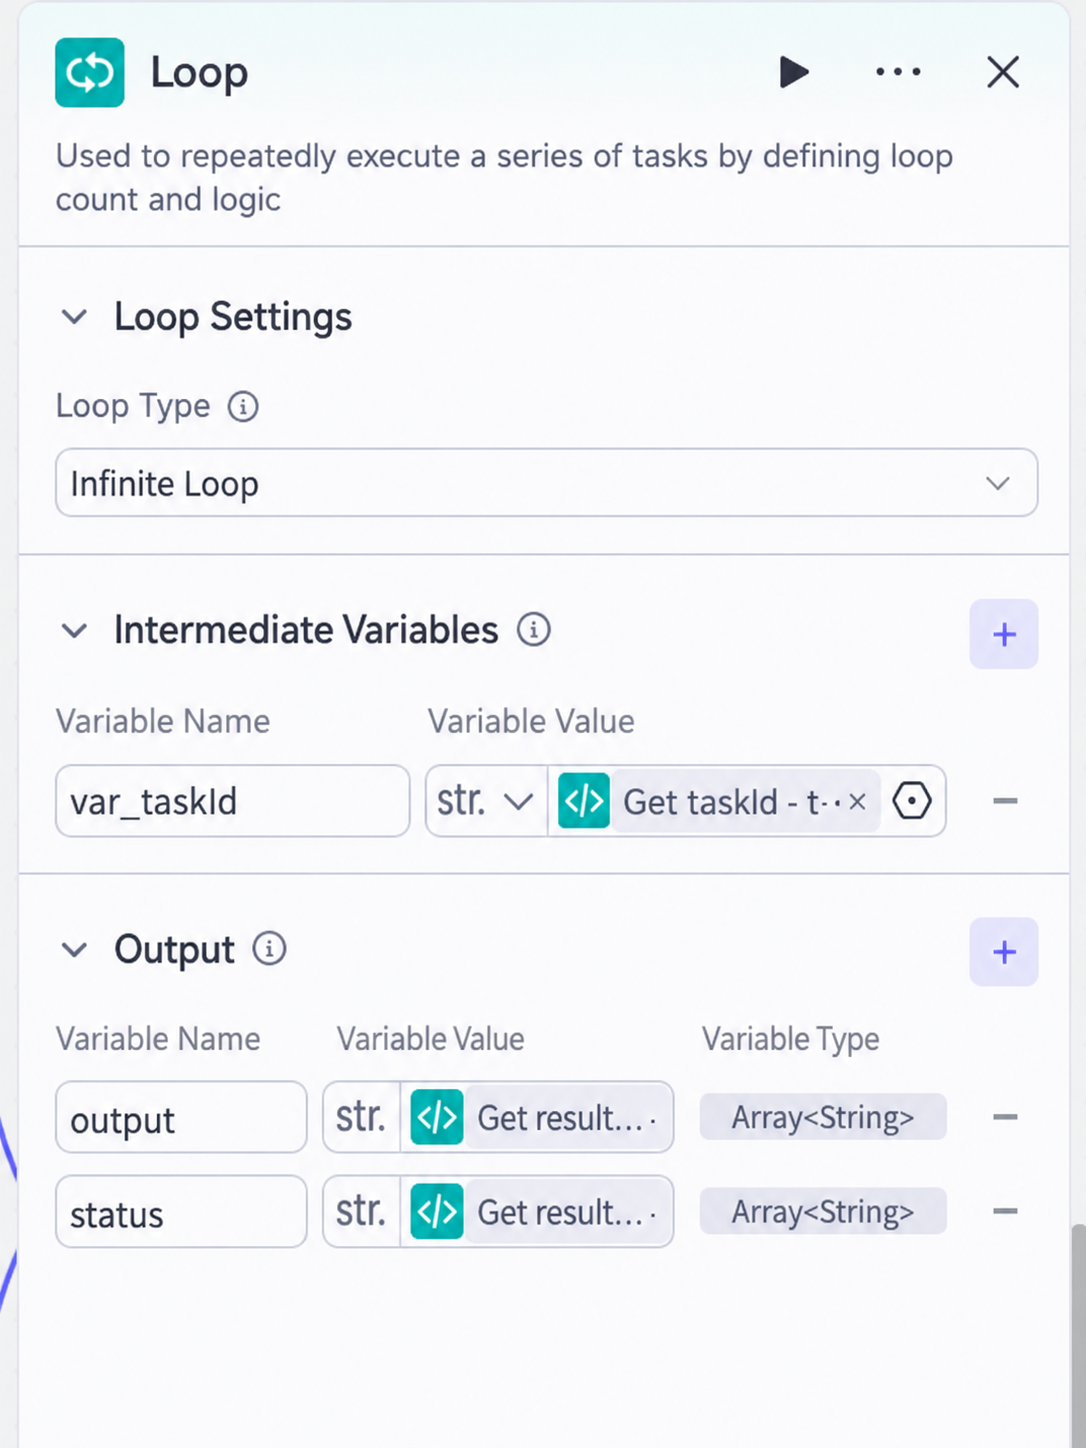
2. Add an HTTP node in the loop to request the query task
The parameters in the request body should be based on the query task documentation for the model being used.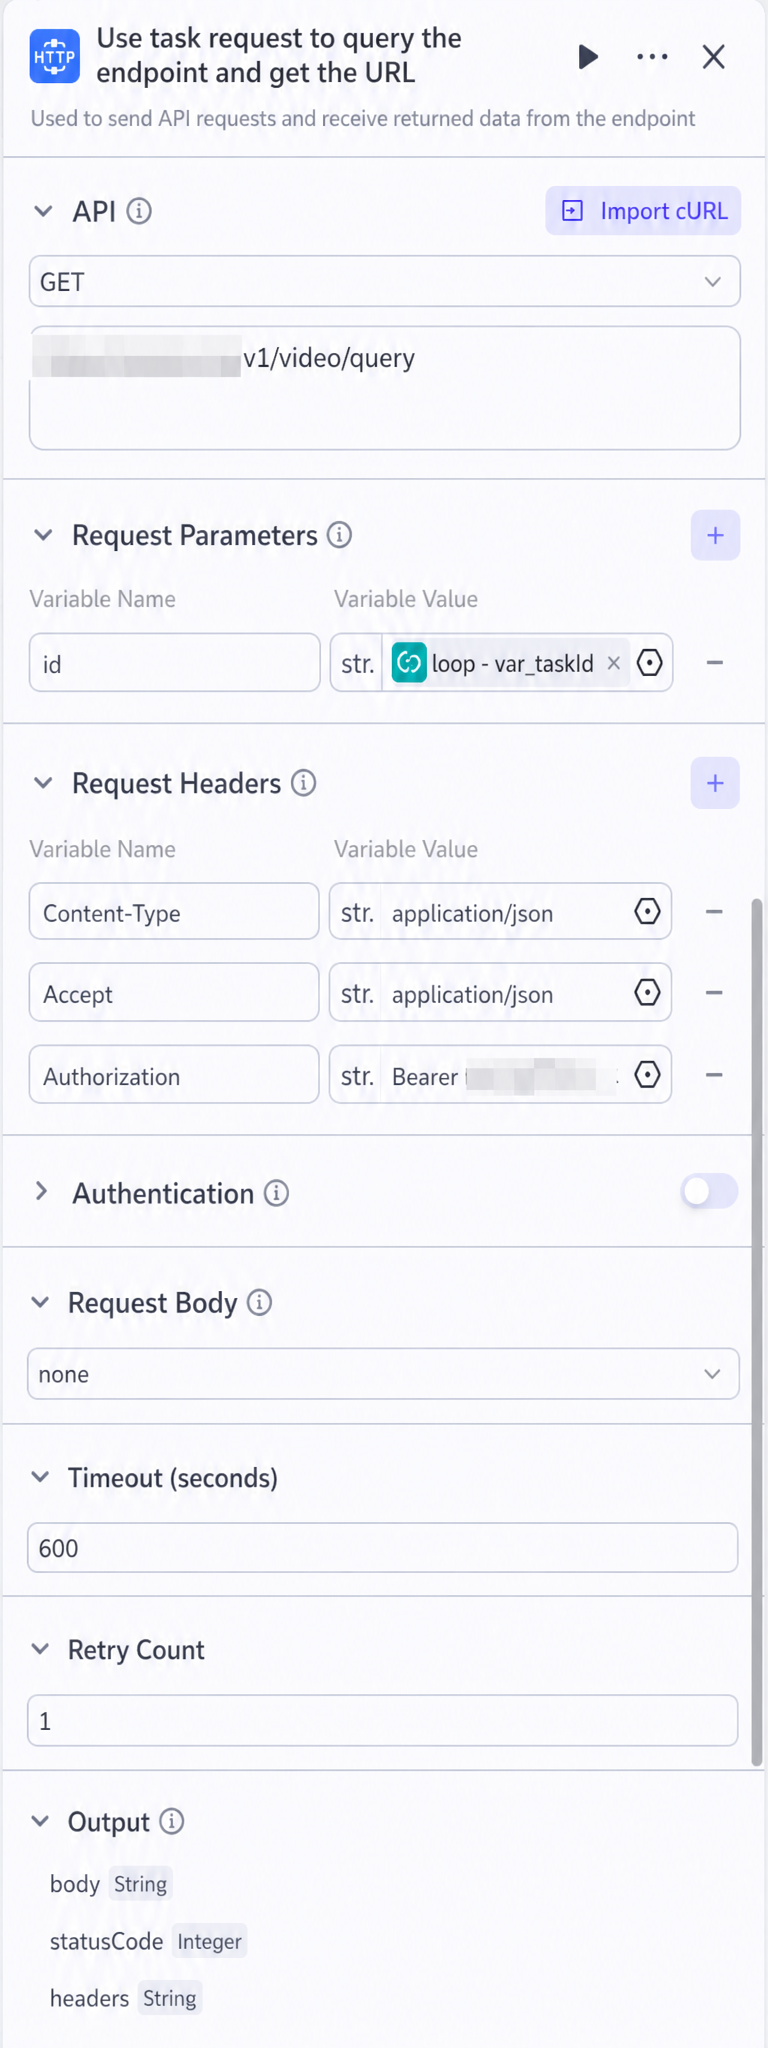
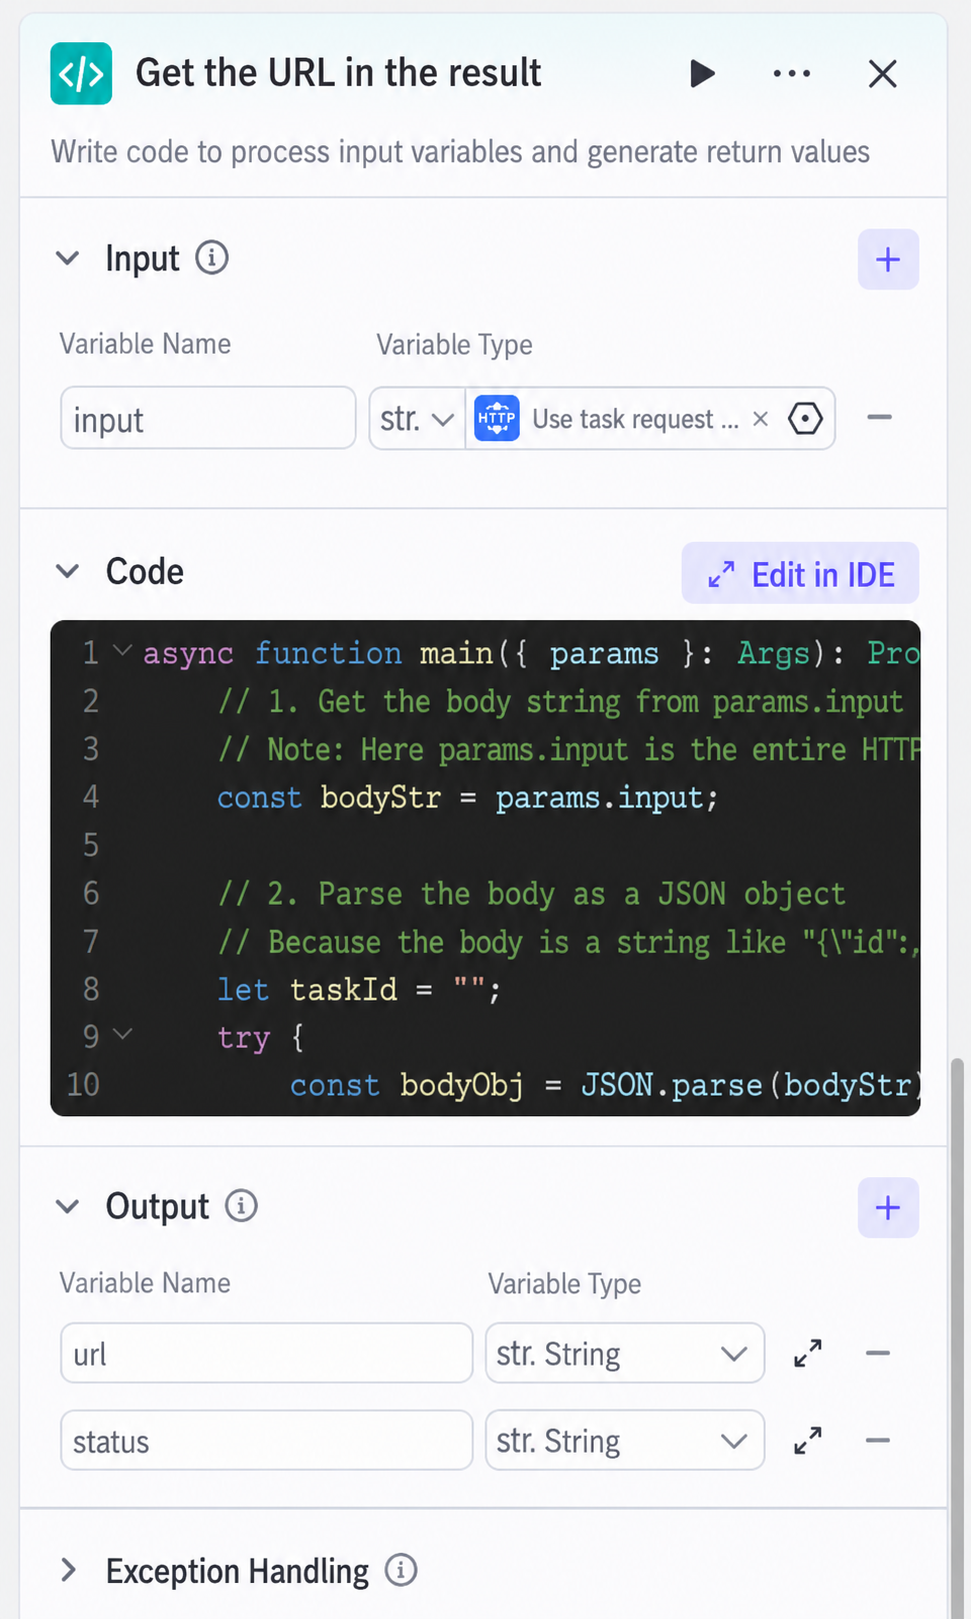
3. Add a code node to get the URL and task status
As shown in the figure, the input is the output body from the query task. The code is as follows:
async function main({ params }: Args): Promise<Output> {
    // 1. Get the body string from params.input
    const bodyStr = params.input;

    // 2. Parse the body string into a JSON object
    let url = "";
    let status = "";
    try {
        const bodyObj = JSON.parse(bodyStr);
        url = bodyObj.video_url;
        status = bodyObj.status;
    } catch (e) {
        // Prevent runtime errors if JSON parsing fails
        console.log("Failed to parse JSON:", e);
    }

    // 3. Build the output object and return the video URL and status
    const ret = {
        "url": url,
        "status": status
    };

    return ret;
}
4. Add a judgment node to determine if the query has retrieved the URL
In this example, the judgment node sets up two branches. The first branch checks if the URL output from the previous code node is empty.
The second branch checks if the status is failed.
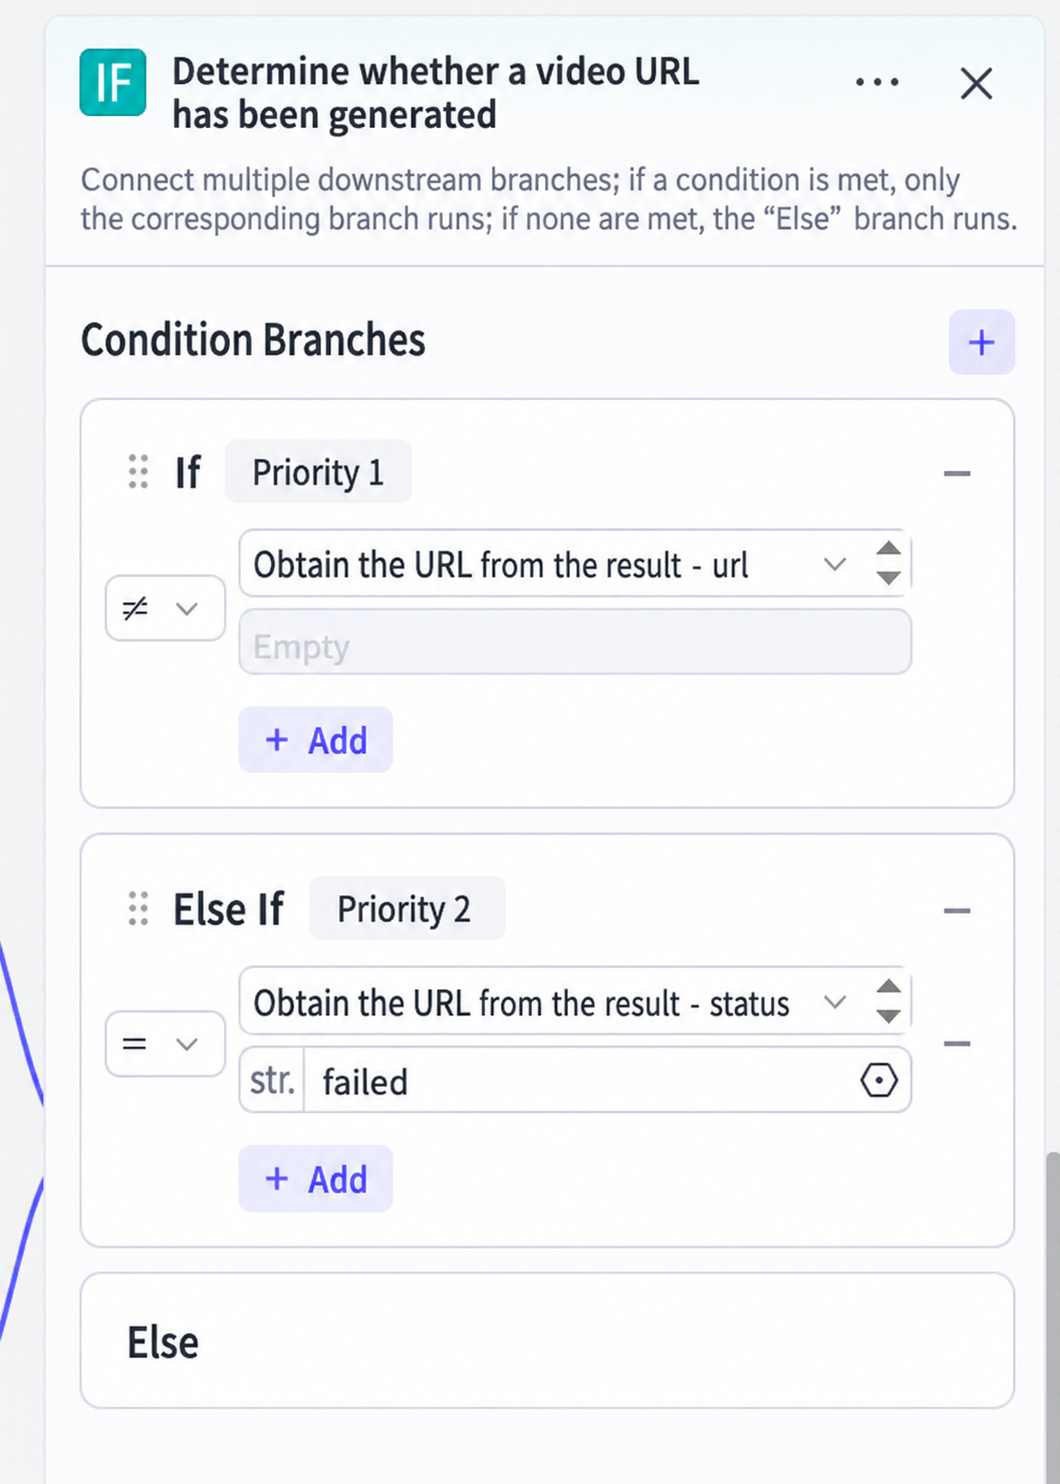
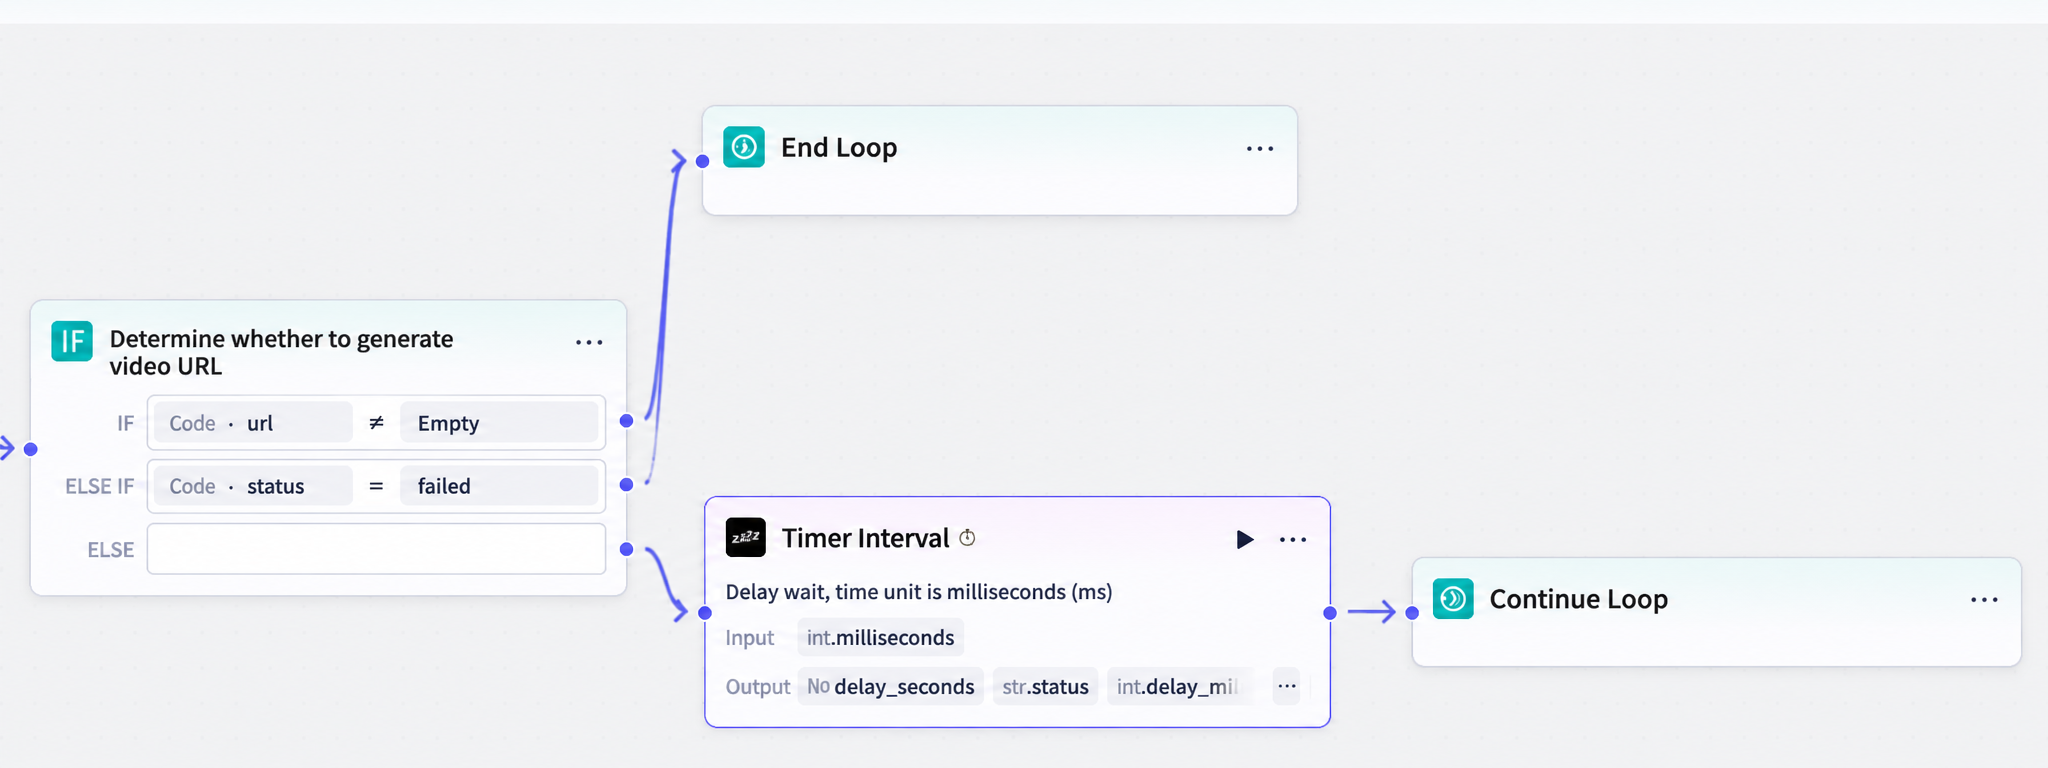
5. Execute based on the judgment result
Add a loop termination node. When the first or second judgment in the judgment node succeeds, terminate the loop.
Add a timer node and a continue loop node. When both judgments in the judgment node are false, first execute the timer (to prevent request concurrency from causing failures, recommended to set to 1500ms), then connect to continue loop.
V. Process the Loop Results (Add a Code Node)
Because the result obtained after the loop is an array, it needs to be processed to only get the final output result (code as follows).
The input is the result output from the loop.
async function main({ params }: Args): Promise<Output> {
    // Get the input arrays
    const urls = params.urls || [];
    const statuses = params.statuss || [];

    // Build the output object and return the latest URL and status
    const ret = {
        "url": urls[urls.length - 1] || "",
        "status": statuses[statuses.length - 1] || ""
    };

    return ret;
}
The output is the processed URL and status.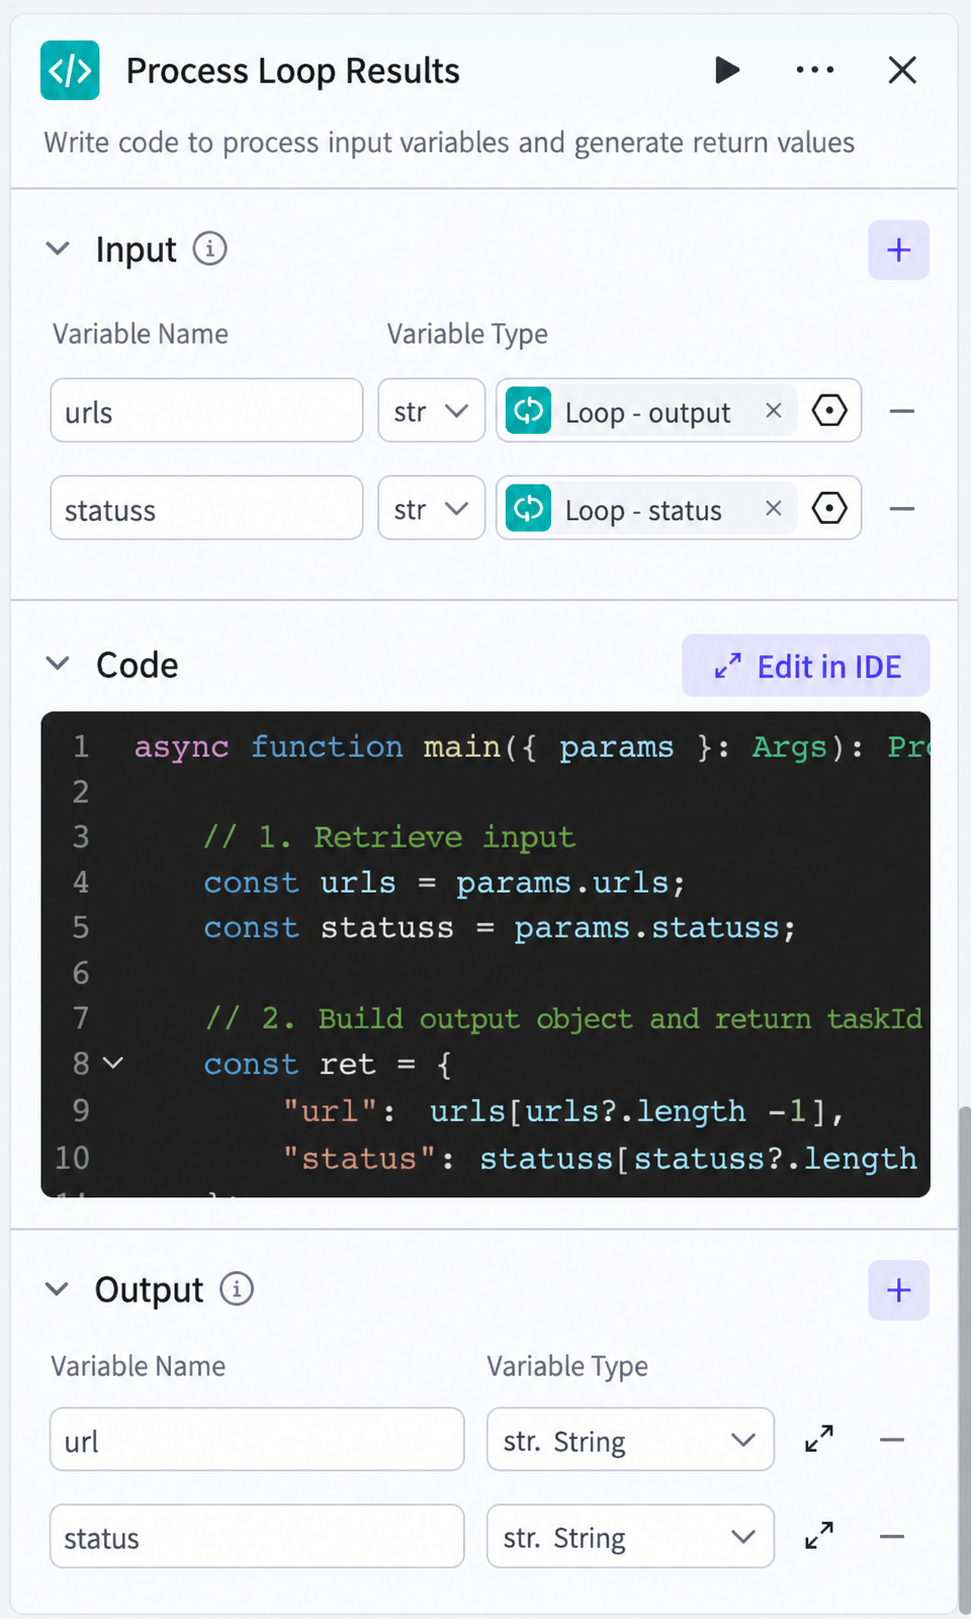
VI. Determine if the URL has a value to confirm if video generation succeeded or failed
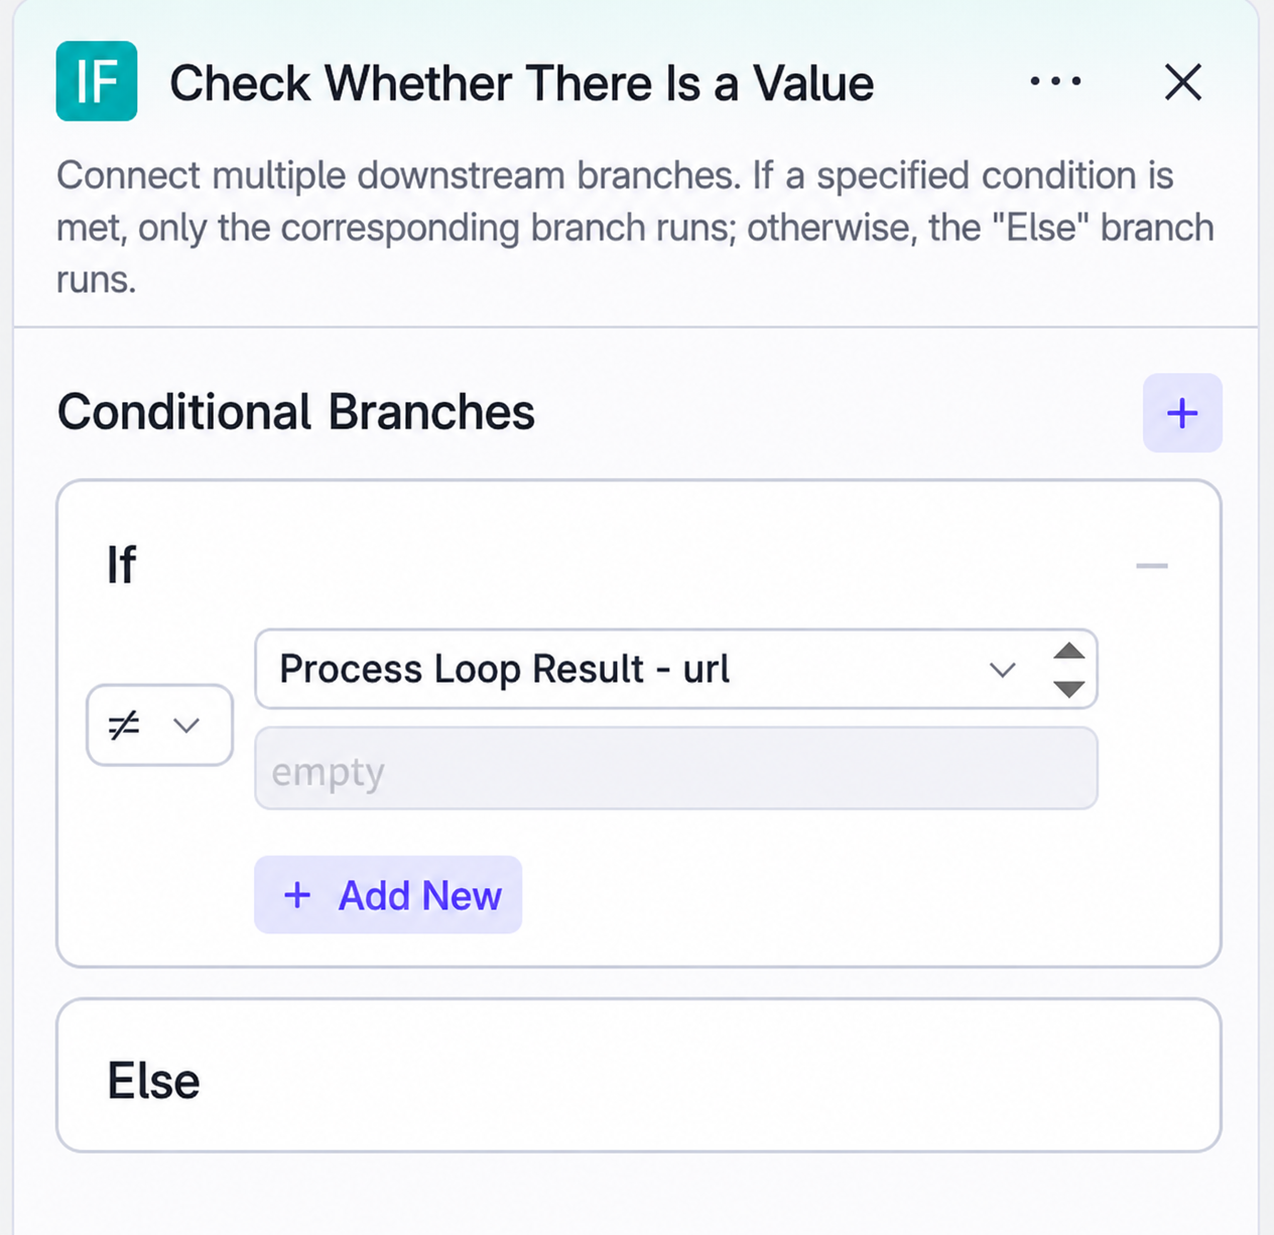
VII. Final Output Result
As shown in the figure, output the success and failure results and then end. You can choose to output text or variables based on your needs, or you can place the output result in the end node output.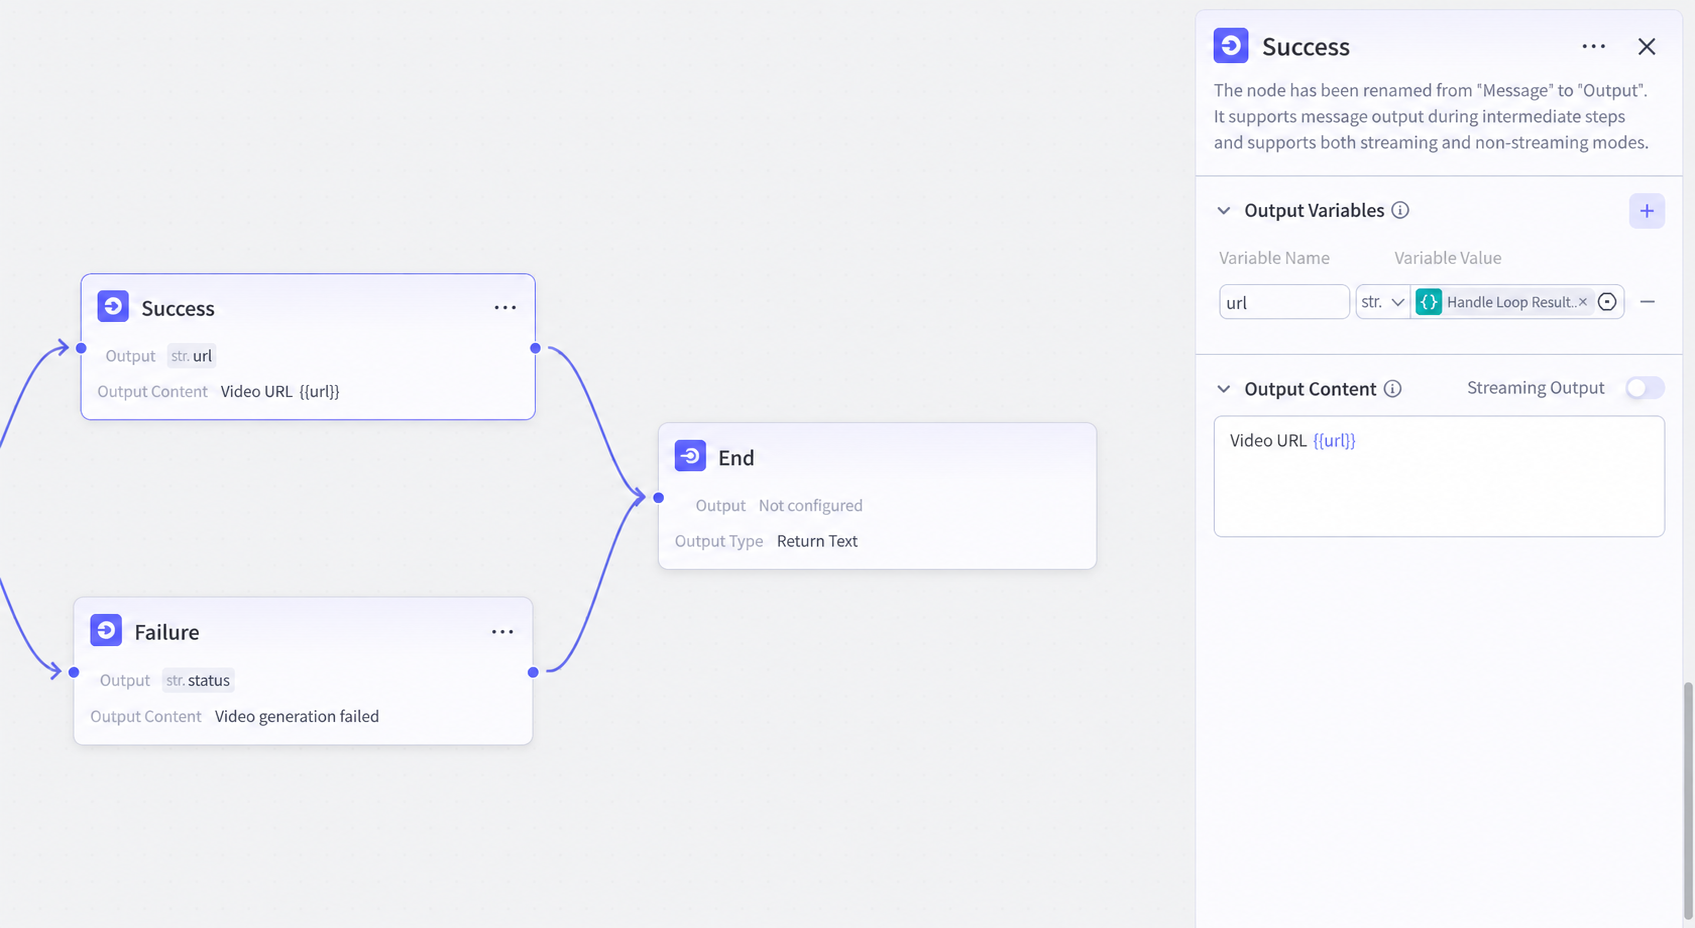

VIII. Implementation Result